Welcome to our Information and Learning Guide! If you're new to 12v - 24v solar, don't worry. It's not magic. Basic systems are pretty simple.
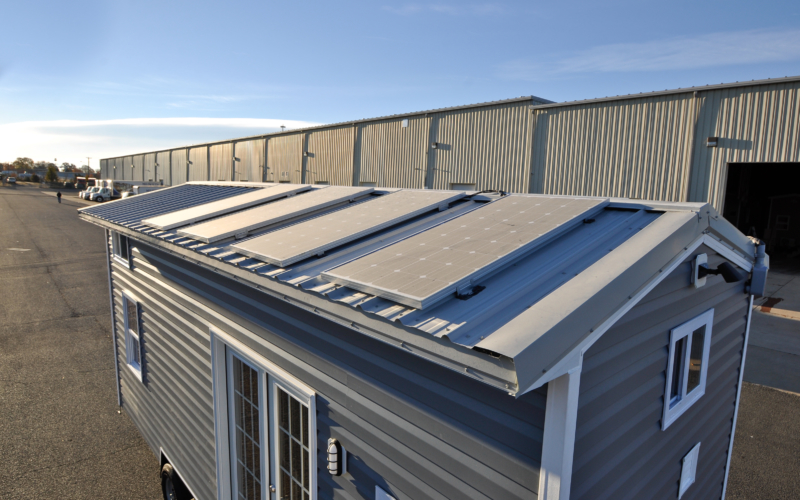
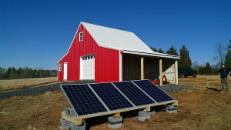
BHA Solar on Tiny House
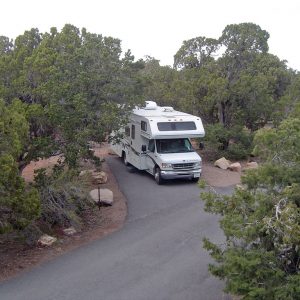
Install an RV or Off-Grid 12 Volt Solar System that WORKS!
By Bill Andersen
BHA Solar - updated Feb 2024
If you are a beginner and are confused about how a stand alone solar system works, the basics are not complicated. 12v panels have 2 wires, pos and neg, and batteries have 2 connection posts, pos and neg.
If you're a total beginner I always caution to start slowly before investing a lot in equipment and learn from a small starter type system and use it a while to really learn how it works and what to expect. ALL the systems are modular and can be expanded.
Basically the solar panels charge the batteries and you run everything off the battery bank. How big a system depends on what you want to run and for how long.
Large systems can run large loads. Running an air conditioner off a small solar/battery/inverter system has always been the holy grail, but efficient air conditioning units like mini splits and lithium batteries now make it very possible. Many people are successfully running small AC units and window units with inverter / solar / battery systems. Most folks full time off grid are very conservative with power and use propane wherever possible, particularly cooking, propane refrigerators and hot water heaters, and space heaters, but new lithium batteries are becoming the new gold standard for solar/battery/inverter systems. They're easier to recharge (5x faster than lead acid, so a smaller solar array is needed) and they last years longer
A good starting point for running full time loads in an RV is something like this:
600W 12v system, 2 x 100AH lithium batteries, and a continuous 2000W 16.7A output inverter
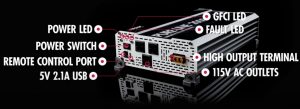
A separate component added to your battery bank for standard 120v residential power is an inverter. A pure sine is needed for refrigerators and anything with a compressor. Factory installed inverters in large RVs are usually 2000W pure sine. Inverters can be hard wired to an elec distribution panel or a sub panel installed by an electrician, or can be used simply with some inverters that have built in outlets and usb ports
System sizing isn't an exact science. Its like deciding how much water you need if you're thirsty, but if your set up isn't providing enough power you can always expand it. All solar systems are modular in that respect. (nobody ever calls me and says "Hey! These solar panels are too much power! I can't use it all!")
It's difficult to compute exactly how big a system you should build, but you can narrow it down during your planning
Large amp draw items can still be used, but conservatively after dark. When batteries are full and the sun is shining, you can use the batteries at the same time as they're charging. Often when running large loads while solar is doing max charging, you're not discharging your battery bank at all!
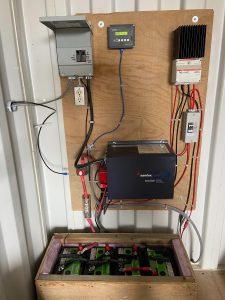
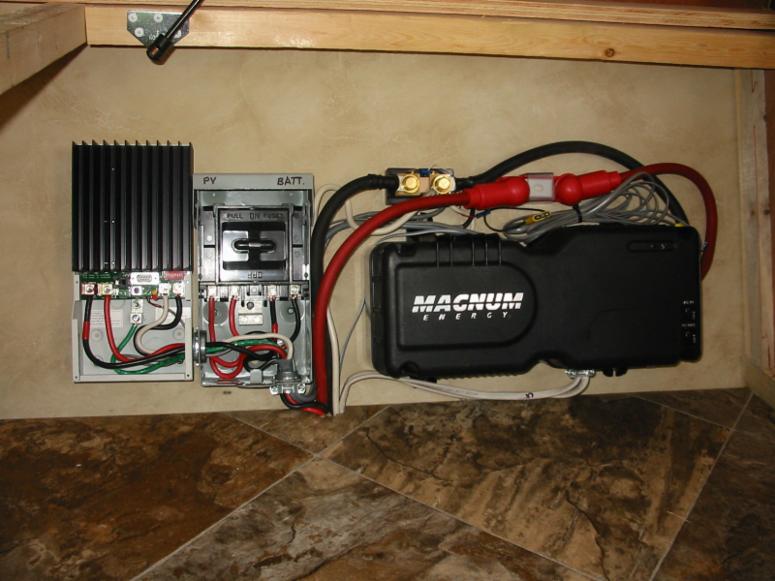
Basics of how you set it up:
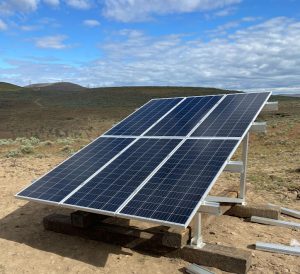
put the panels in FULL sun.
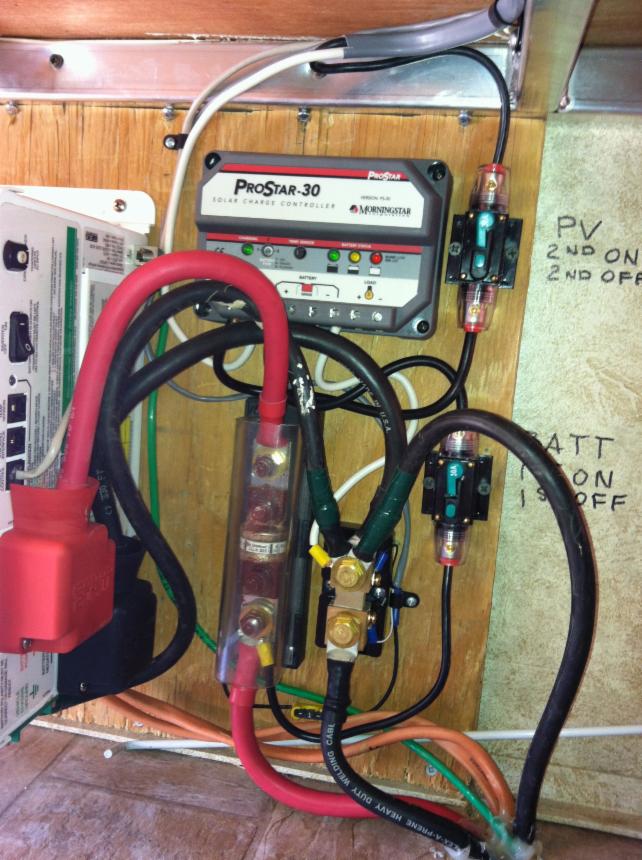
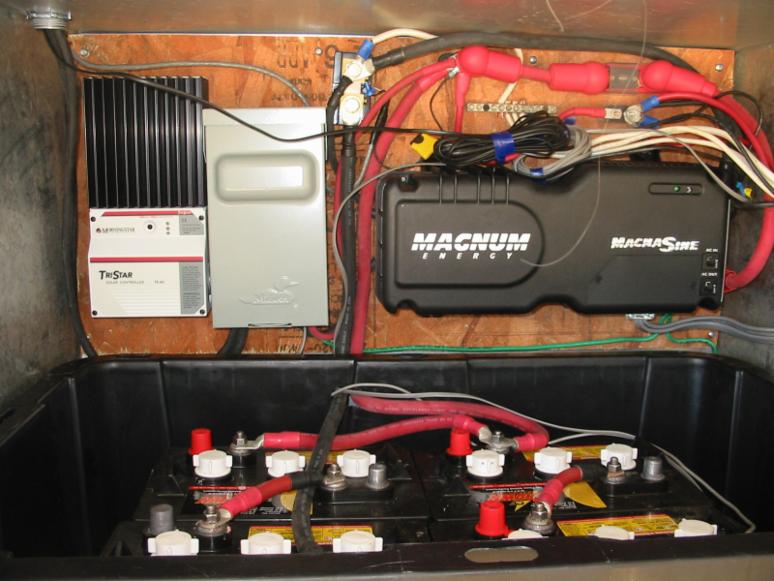
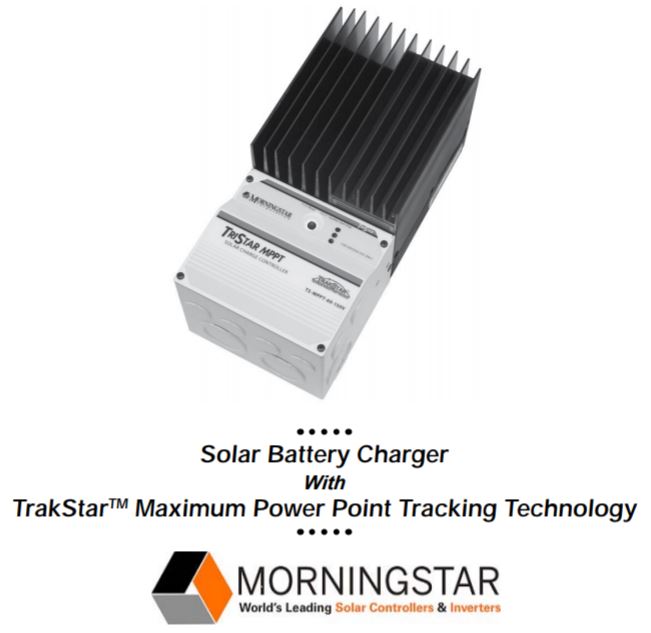
connect the pos and neg wires to a charge controller (Morningstar is the best by far and all we've sold for 14 years)
keep controller as close as possible to battery connections with heavy battery cables. This is critical to prevent voltage loss.
connect an inverter to batteries for 120va
Once you've been using your solar power a while you'll be able to zero in on what your actual daily AH (amp hour) usage is and increase the size of the solar charging appropriately.
Then you can size your battery bank for however many days you'd want to go with continuous power without any charging. (solar panels produce zero power when covered by snow) most folks try to have 3-5 days autonomy.
.
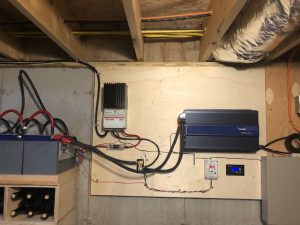
Install by Durand C. in Maine 800 watts
Our kits are designed with 12v solar panels which can be configured for 12v by connecting in parallel (pos to pos and neg to neg) or 24v by connecting pairs of panels in series (pos to neg) and to be fairly easy and uncomplicated to put together yourself. Don't pay too much attention to forums or you-tube videos. Many if not most don't have a clue and some are totally wrong, giving bad advice
There is no one size fits all system design, but the basic rules are the same. RV and small off grid solar systems typically can supply power for most everything up to and including a microwave or small air conditioner. Folks off grid full time typically use propane for cooking, heat, hot water and propane fridge. Batteries easily power the elec controls for gas appliances, and everything 12 volts in an RV like lights, water pump and furnace fan. An inverter supplies 120vac power. When air conditioning is needed many RVers either move north, pay for shore power or run a generator. Hybrid solar systems can run large loads using a much smaller gen as a supplement with the inverter/batteries
Solar panels and a Tristar controller can recharge Lithium batteries 4-5x faster than lead acid. REFILL your battery bank easily every single day!
We want you to have a system that actually works well and lasts for years, but here's a critically important thing you should know
Your Off Grid or RV Solar panel system is only as good as the charge controller, the heart of your system and all controllers are far from equal.
Besides complete system failure when a controller goes bad, the chronic undercharging of your expensive batteries will cause them to fail and need replacement much sooner. Morningstar is an American company and has had over 2.5 million controllers installed in 112 countries over 25+ years. MANY are still in operation today. The finest charge controllers in the world are Morningstar MPPT. Amperage and voltage ratings differ, but more importantly, charging algorithms, protections, warranties and advanced features vary greatly between brands. The finest charge controllers in the world are the Morningstar MPPT LEARN MORE HERE - 5 REASONS TO USE MPPT (OR NOT)
BHA SOLAR  5 year warranty and 15 year expected life
___________________________________________________________________________
SOLAR GENERATORS LEARN MORE HERE
-----------------------------------------------------------------------------------------------------------------------------
The following 2 links are experts and provide a massive amount of RV / OFF GRID 12v solar knowledge.
These sites haven't been updated lately but still have mostly applicable information and are great free learning sources and a good place to start
HANDYBOB - Making off grid RV electrical systems work
I really like Bob and owe him many thanks for all his knowledge. A retired electrical engineer very compassionate about RV solar, who was off grid by 2003. He is aimed at the "frustrated, technologically challenged and budget minded RV owner who needs basic education about battery supplied electrical power."
It takes hours to read, he's long winded, and rants on the state of the RV manufacturing and RV Solar industries but If you read all of it and follow his advice, you will have a great system that works and gets the batteries 100% full so they last longer! Read it more than once, (it's free, but he welcomes donations!)
JACK MAYER RV SOLAR ELECTRICAL
Another expert, he wrote a book about RV Solar and has it available for free. His information is a little more complicated, and from the viewpoint of one who can afford to spend more money. It's well organized and has a LOT of expert advice and instructions with photos
We've distilled down and summarized a few of the most important points below

1. NO SHADE
Just shading on one small square on a panel drastically reduces the output of the ENTIRE panel
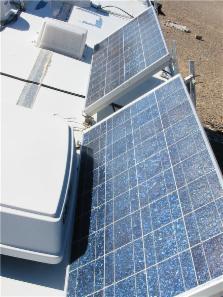
See those little shadows?
Surprise! Minus 6.4 amps from these two panels! This is 90 % of the output of a full panel. When solar panels are configured in series then the entire string will be effected, but in parallel only the panel shaded will be effected
2. USE BIG ENOUGH WIRE
Voltage loss is the enemy in these systems, and is especially critical from charge controller to battery. Keep wire runs as short as possible, and use the proper cable size. (Don't waste money on wires bigger than needed for 2% drop on MPPT systems or 5% on PWM systems) Use a wire sizing calculator like this one
3. CHARGE CONTROLLER AS CLOSE AS POSSIBLE TO BATTERIES
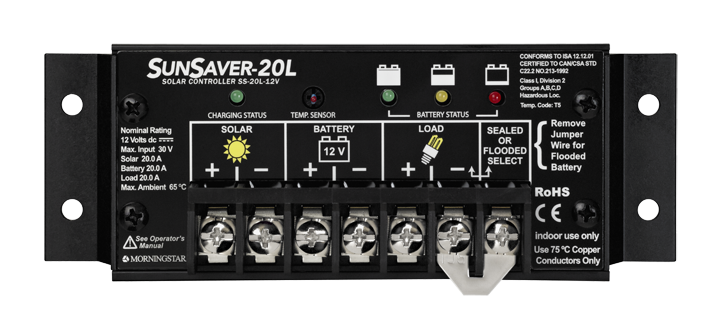
Distance under 3' with large wire. Max wire size accepted: 10 AWG for Sunsaver controllers, 6 AWG for ProStar, and 2-4 AWG for TriStar. Splicing a piece of 10ga onto larger wire is OK and won't get hot if done properly, or simply clip some of the fine wire strands off larger wire until it fits. This won't affect anything.
4. USE A REMOTE TEMPERATURE SENSOR
It will send more voltage when batteries are cold so they still get 100% charged. It'll reduce the voltage when batteries are hot so they don't overcharge. (A temperature sensor on a controller that is located in a heated area will not see the battery temperature, so it will not work.) The Sunsaver controllers do a good job in cold weather with built in temperature compensation, and the ProStar and TriStar remote temperature sensors are a must. (adding the temp sensor to Prostar controllers requires soldering 2 wires)
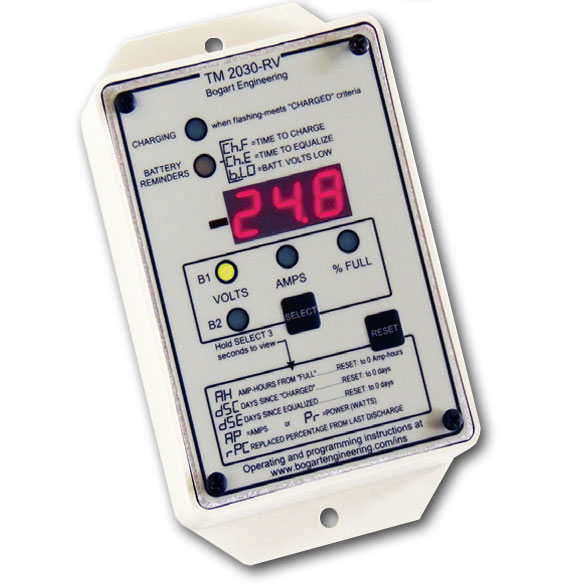
5. INSTALL A TRIMETRIC METER & WHOLE SYSTEM MONITOR
Every 12 volt solar system should have a real battery monitor that includes percentage (%) of charge. Not just voltage. This is the only way to ever be confident that your system is really working. learn more
6. CORRECT CHARGE CONTROLLER VOLTAGE SETTINGS ARE CRITICAL FOR CHARGING BATTERIES
*check with the battery manufacturer
If you can get a TriStar controller it has volt set points as high as 14.8 , or Bogart SC2030 can easily be set to any voltage at all. It is even smarter than a Tristar. It will charge better and faster than any other PWM controller. The smaller Morningstar controllers are 14.4 volts with built in temperature sensors, which will get the batteries full, but it takes a little longer. The RV Battery Charging Puzzle
BHA RV Solar kits save you money. Top quality parts that maximize charging and life of your batteries
Awesome 1200 watt solar Off Grid system installed on Bainbridge Island in Wa. by Doug H.
___________________________________________________________________________________________________________________________
BATTERY INFO from solarseller.com
Contents
Battery System Sizing SIZING YOUR BATTERY SYSTEM
Deep Cycle Battery DEEP CYCLE BATTERY
Electrolyte ELECTROLYTE
VRLA (valve regulated lead acid) Battery VRLA BATTERY
Gel Cell Battery GEL CELL BATTERY
AGM (absorbed glass mat) Battery AGM Battery
Flooded Type Deep Cycle Battery FLOODED TYPE BATTERY
Self-Discharge Rate SELF-DISCHARGE RATE
Charge Rate CHARGE RATE
Electrolyte Level ELECTROLYTE LEVEL
Equalization Charging EQUALIZATION CHARGING
State of Charge STATE OF CHARGE
Battery Life BATTERY LIFE
Battery Location BATTERY LOCATION
Used Batteries USED BATTERIES
Battery Safety Battery Safety
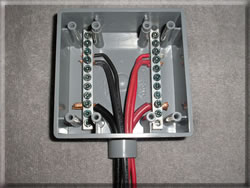
SOLAR BATTERY WIRING DIAGRAMS HERE
How to wire 6v and 12v batteries together in series and / or parallel
Wiring of fuse / breaker devices is covered in detail in this article
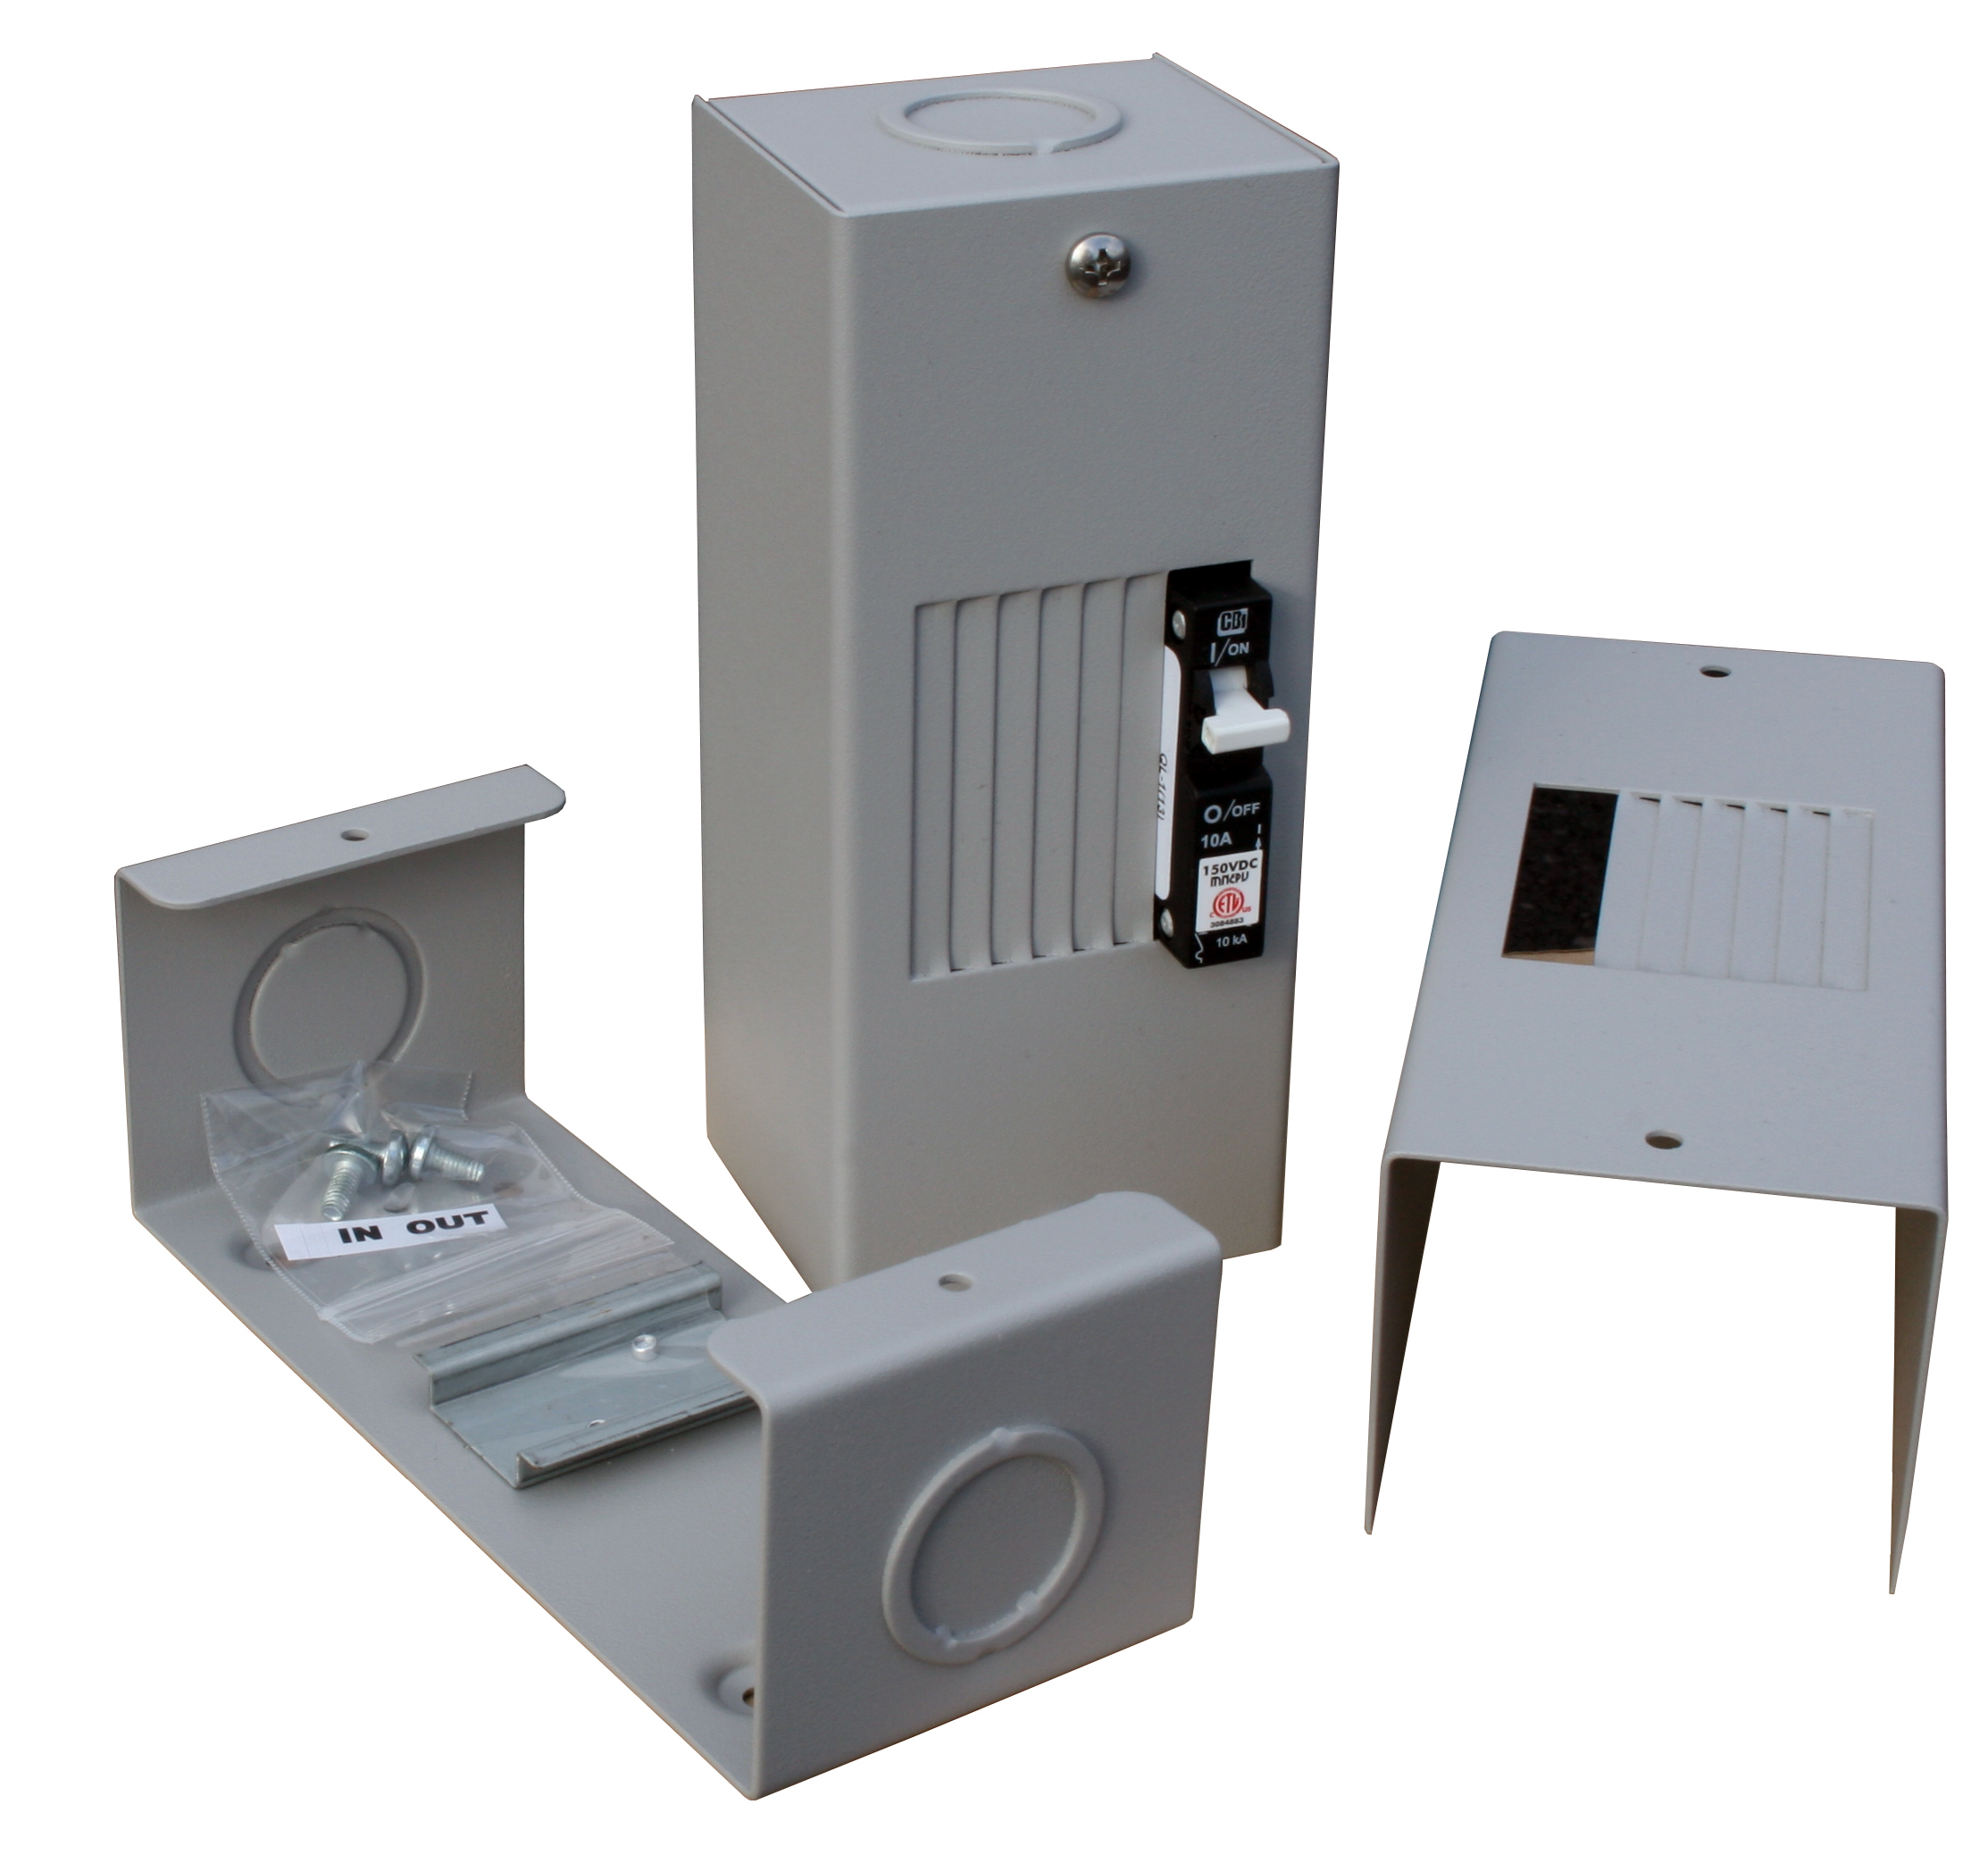
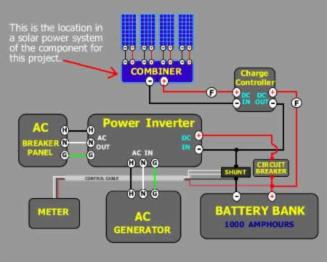
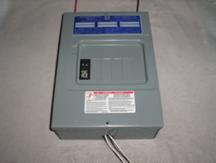
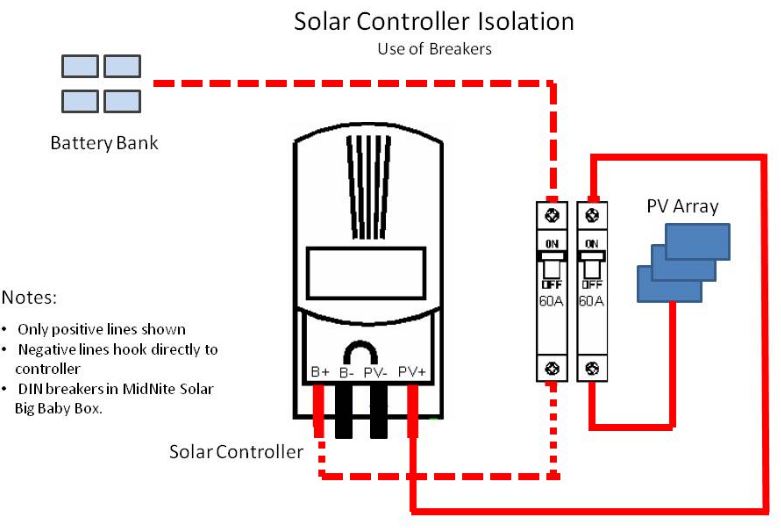
SOLAR CONTROLLER DISCONNECTS
Fuses/Circuit Breakers:
"In-line fuses or circuit breakers are important to protect the wiring and components in your system from shorts and other catastrophic failures. Place one on the positive wire within a foot of your battery and another in between the combiner box and the charge controller. The size of the fuse or breaker depends upon the size of wire used in your system. Place no larger than a 30 amp fuse or circuit breaker for 10-AWG wire; no larger than a 48 amp fuse for 8-AWG; no larger than a 74 amp fuse for 6-AWG; and no larger than a 120 amp fuse for 4-AWG wire."
Fuses for Inverters to battery: Always use the exact factory recommended size fuse stated in the installation instructions
More good info and pics:
From Kelly's RV Solar Blog - Great blog with lots of interesting info and good photos.
Excellent complete wiring diagrams of 2 systems
Diagrams From Jack Mayer w/ reading at RV Solar Electric
Integrating a system with inverter & subpanel
System powering main load center w/ inverter
All charging sources integrated
Typical Wiring Examples below

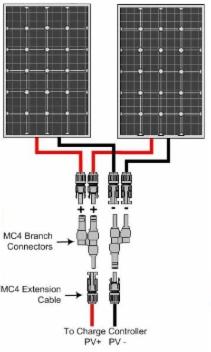
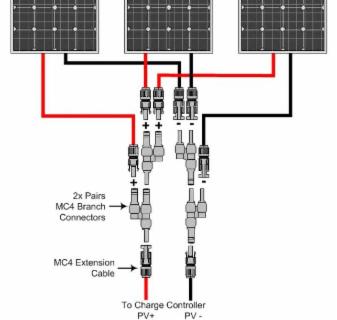

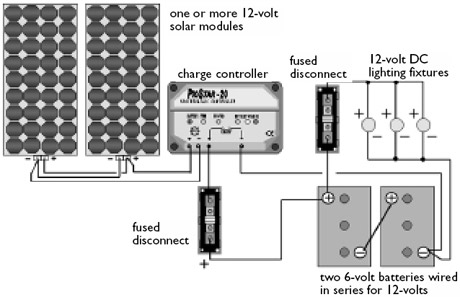
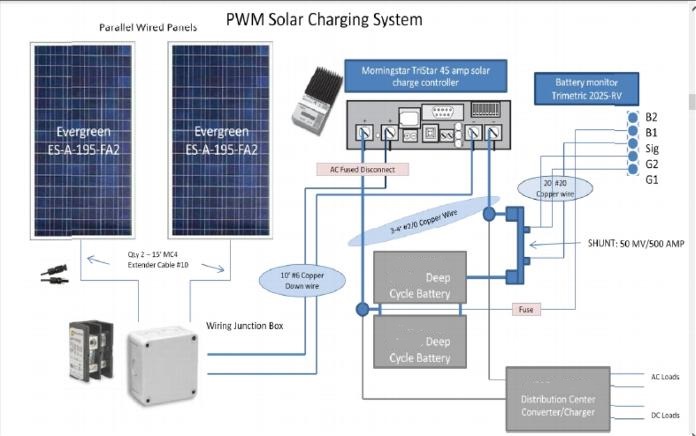
Typical Wiring Examples above
EASY DIY PLANS
|

DISCLAIMER : Always make sure that all of your equipment is properly fused and grounded for safety. Also, be sure to read and follow the advice and instructions that come with your equipment. While our projects have actually been constructed and tested under actual operating conditions, we do not guarantee that they will meet all electrical codes in all locales. Nor do we suggest that our advice supercedes the recommendations of a licensed electrician. Hey, we're just trying to help!
-------------------------------------------
SOLAR GENERATOR KIT $2799
2000W-4000W SURGE, 1260 WH ON DEMAND, 400W SOLAR MPPT
Put together your own dependable "solar generator" system for long term outages or full time use
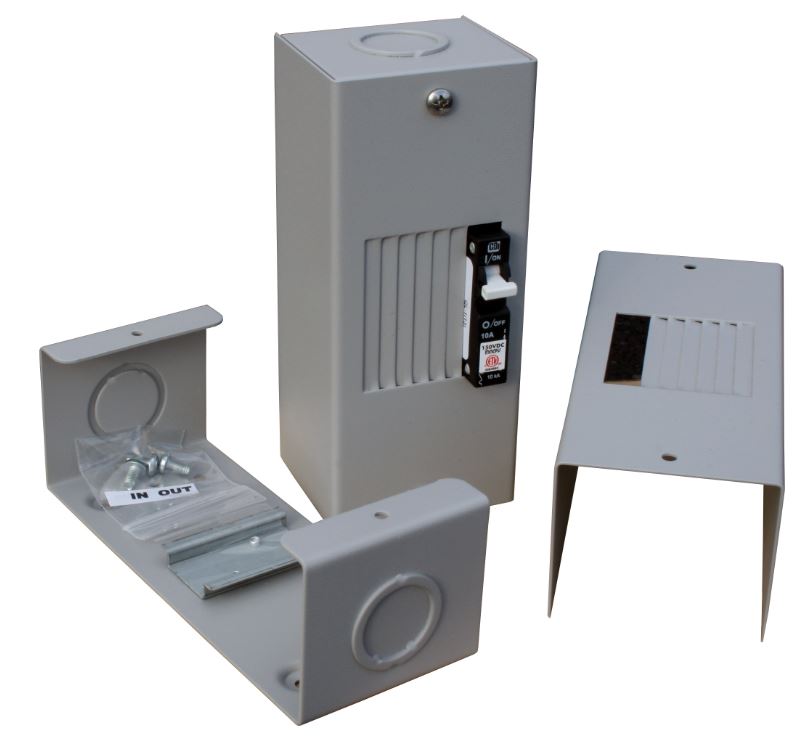
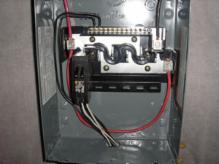
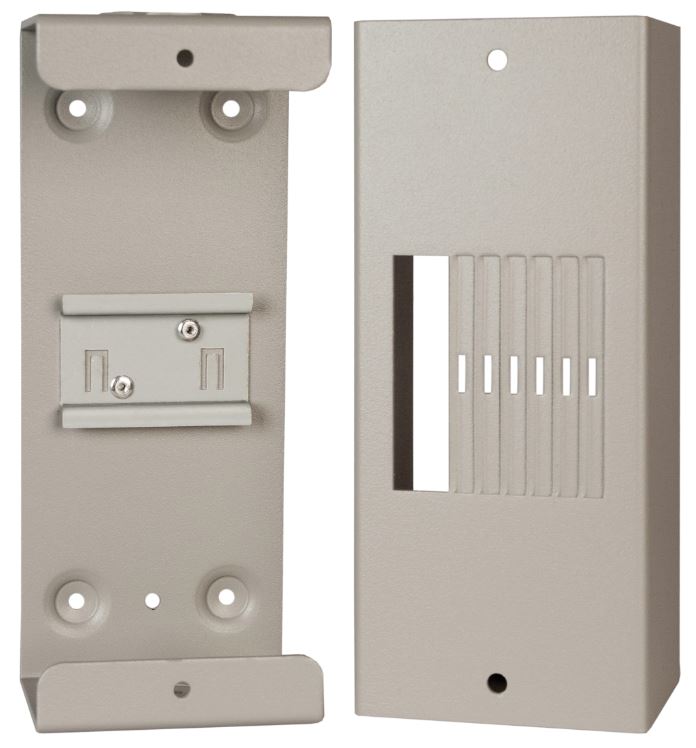
Midnite solar baby box with 2 breakers and free shipping $99
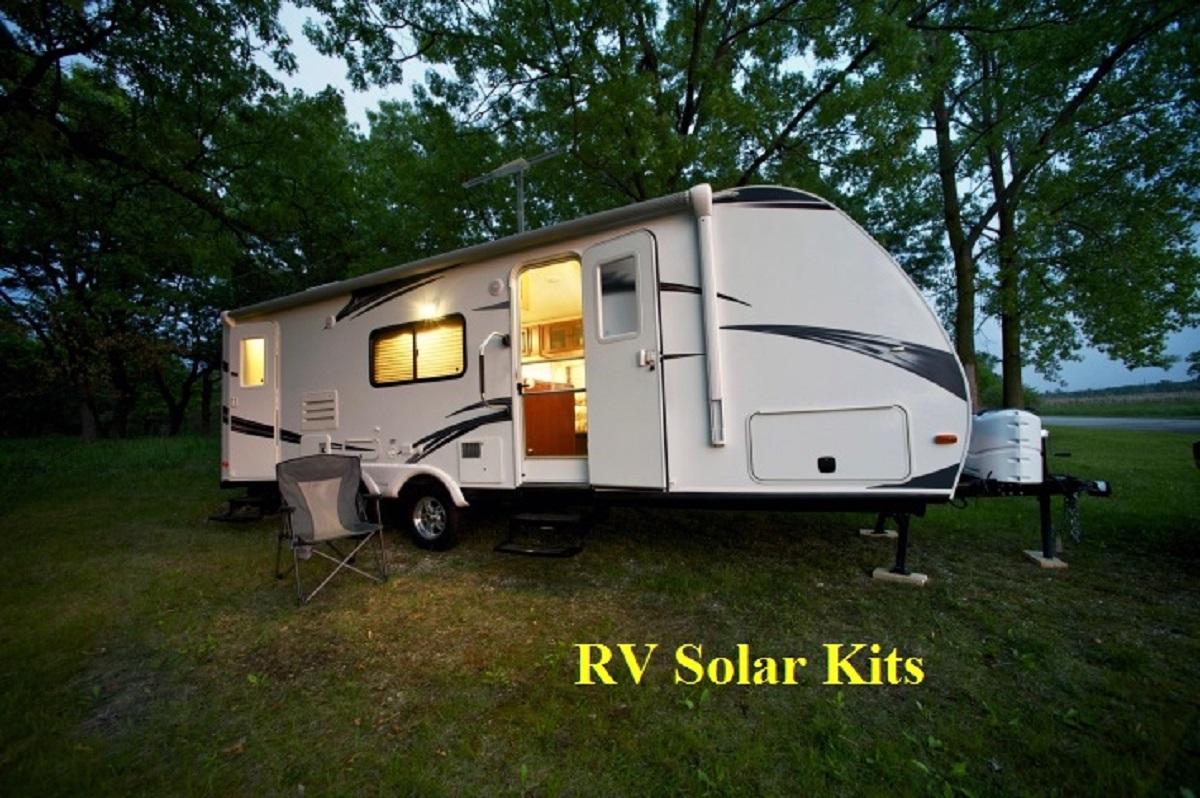
RV SOLAR KITS
600 Watt RV 3 panel Kit $999
800 Watt 4 panels $1299
Mornungstar Tristar 45 MPPT controller gives 20-30% Gain in charging amps
COMPLETE OFF GRID KITS
All include 120v inverters

SOLAR CHARGE CONTROLLERS
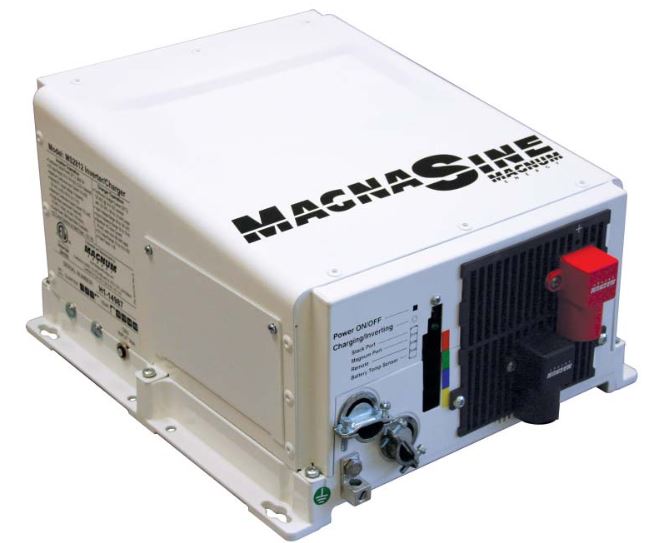
INVERTERS
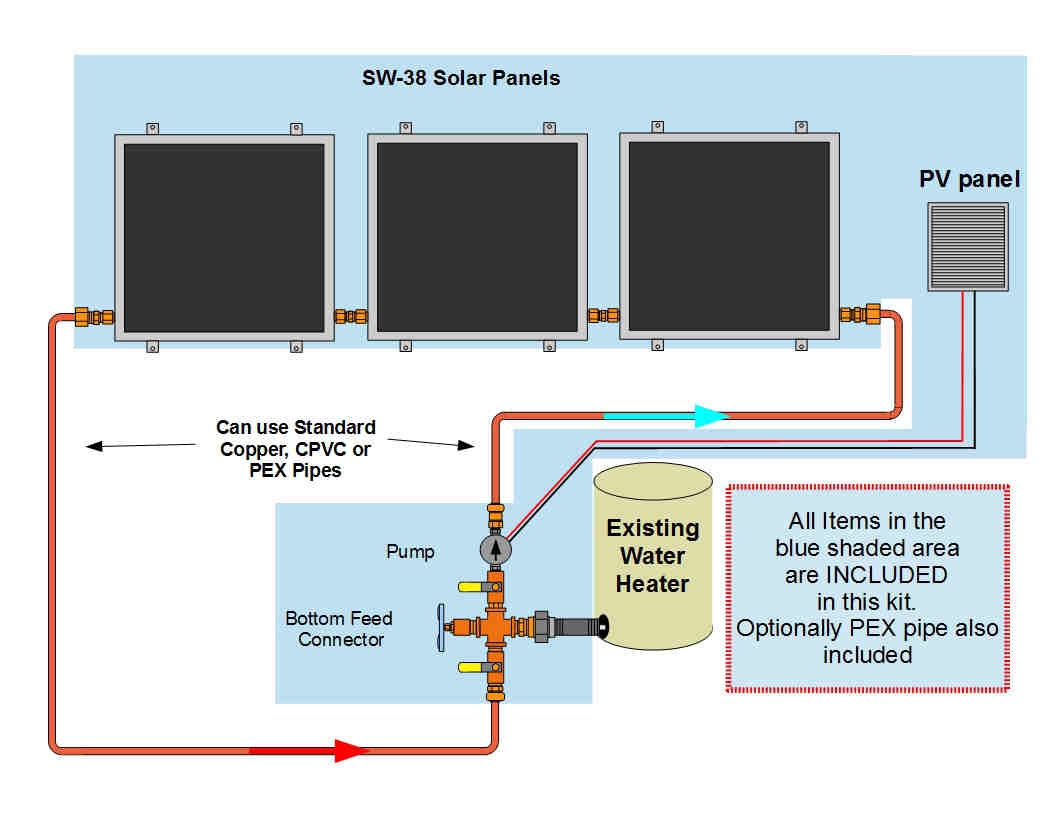

SOLAR HOT WATER KITS
400 WATT 2 panel RV SOLAR KIT $699

1200 WATT 24V OFF GRID KIT $2799-$3499
3000W Pure Sine Inverter